In order to access this function, your user must be a Community Administrator.
To create a new group follow these steps:
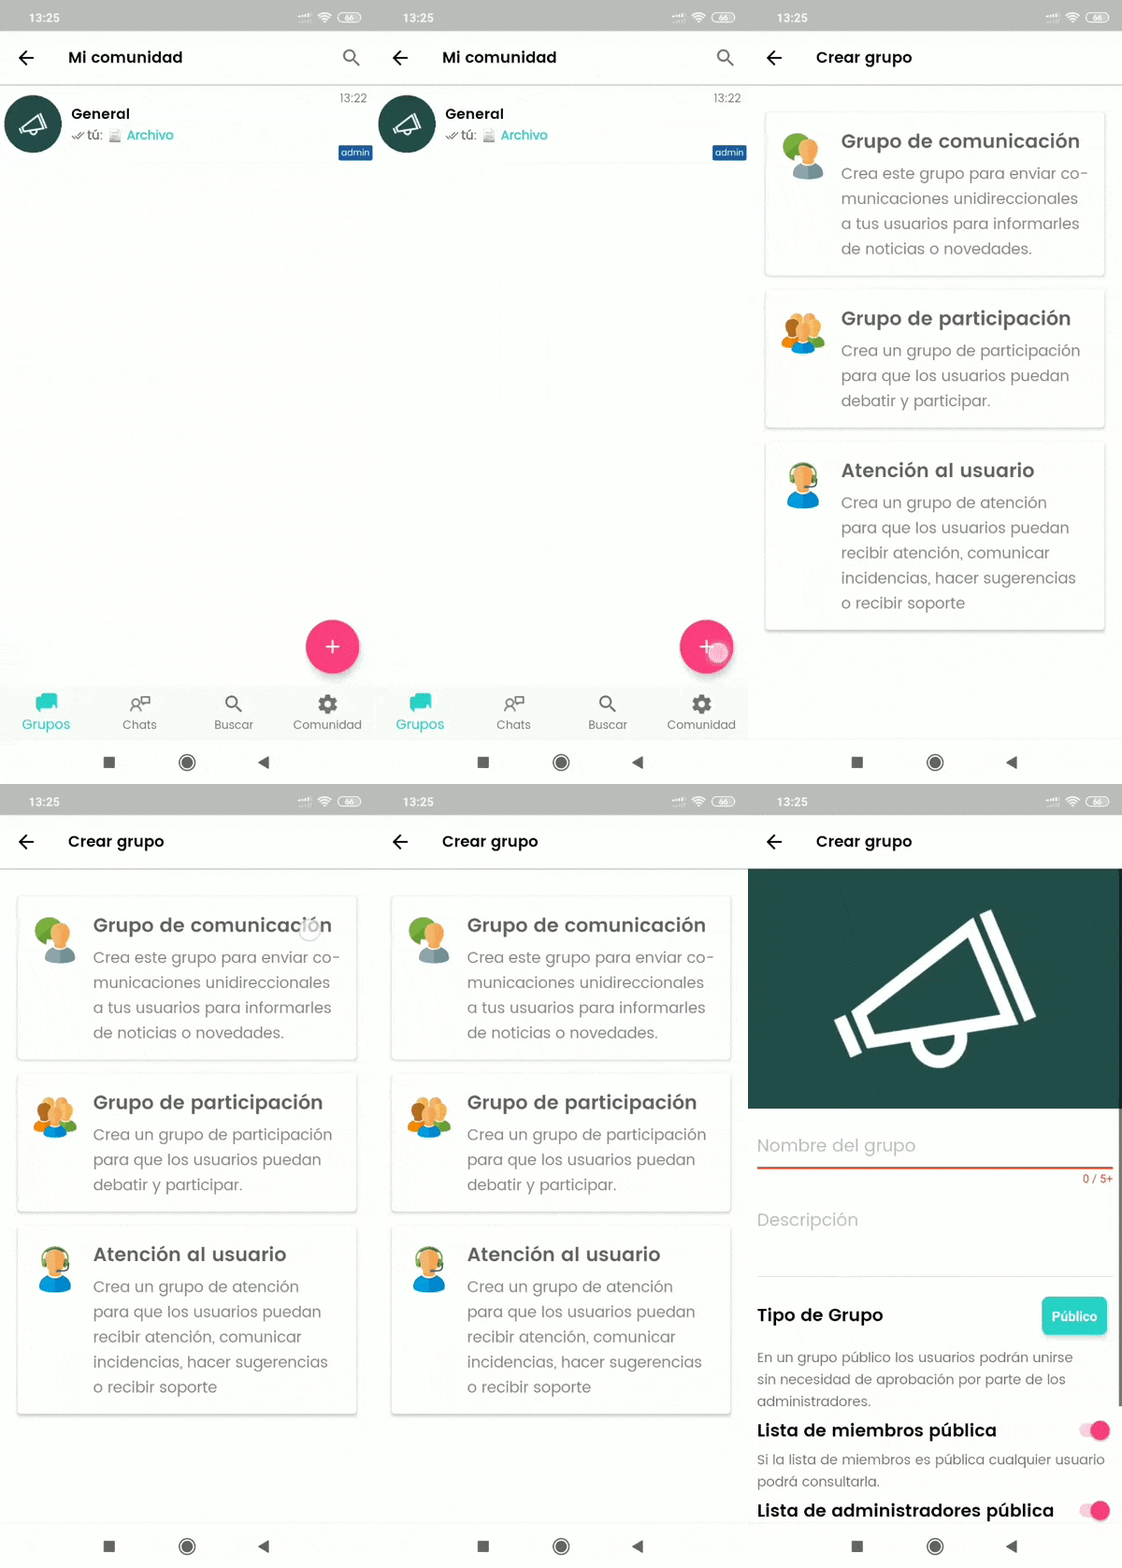
- Enter the community where you want to create the group. Press the + button (in Android) or the create icon in the upper right (in IOS) to enter the option to create group.
- Select the Group Type. You can select from one of these types:
- Communication Group. In a communication group it is a unidirectional communication channel, that is, it is a group where only administrators and moderators can write and send content. The rest of the users can only receive the communications that are published. This group is very useful in scenarios where you want to send communications avoiding that the relevant information is diluted among many messages.
- Discussion Group. In a discussion group, unlike the previous one, all users who join the group can write and send content. This group is very useful in scenarios where you want to collaborate with a number of people, such as work teams or groups to coordinate between several people.
- Attention Group. This type of group allows users to individually contact the administrator users and moderators of the group. For example, this type of group can be used to report incidents, open claims or make inquiries.

Once you have selected the type of group, you can finish your configuration on the following screen:
- Enter the Group Name. This is the name by which it will be known and displayed in the group search results.
- Click on the image above to select the Image of your group. You can select the image you want from the device.
- Optionally enter a Group Description.
- Indicate the Type of subscription. Your group can be of the following types:
- Public. The group is visible by users and can be freely joined. Use this group if you want the content to be displayed by any member that is linked to the community.
- Moderate. The group requires prior approval from the administrators or moderators to join it. Use this group when you want to have restricted or protected content to a number of specific people in your community.
- Private. This type of group makes it totally private, so your users cannot join or request access to it. In order to add users, you can only do so through the option Add users to the group.
- Indicate if you want the List of group members to be public or not. By default this option is enabled. If you mark it, the other users of the group will be able to see the list of group members, in the group information screen. If you deactivate it, only users who are Community Administrators and group moderators can access this option. Check this option if you want privacy between users in a group.
- Indicate if you want the Group Administrators List to be public or not. By default this option is enabled. If you mark them as public, the other users will be able to see on the group information screen who are the administrators and moderators and will be able to contact them after accessing their profile through a private chat.


